
How to create replays of live streams
There are two ways to create replays of live streams:
1. Auto generate replays one a stream has ended
Benefits:
- Seamless replay creation
- Retain the ability to alter pricing, share value and geo-availability from the existing stream
2. Manually create replays
Benefits:
- Crop the original stream
- Control what content appears on your Full Channel Widget
Auto generate replays one a stream has ended
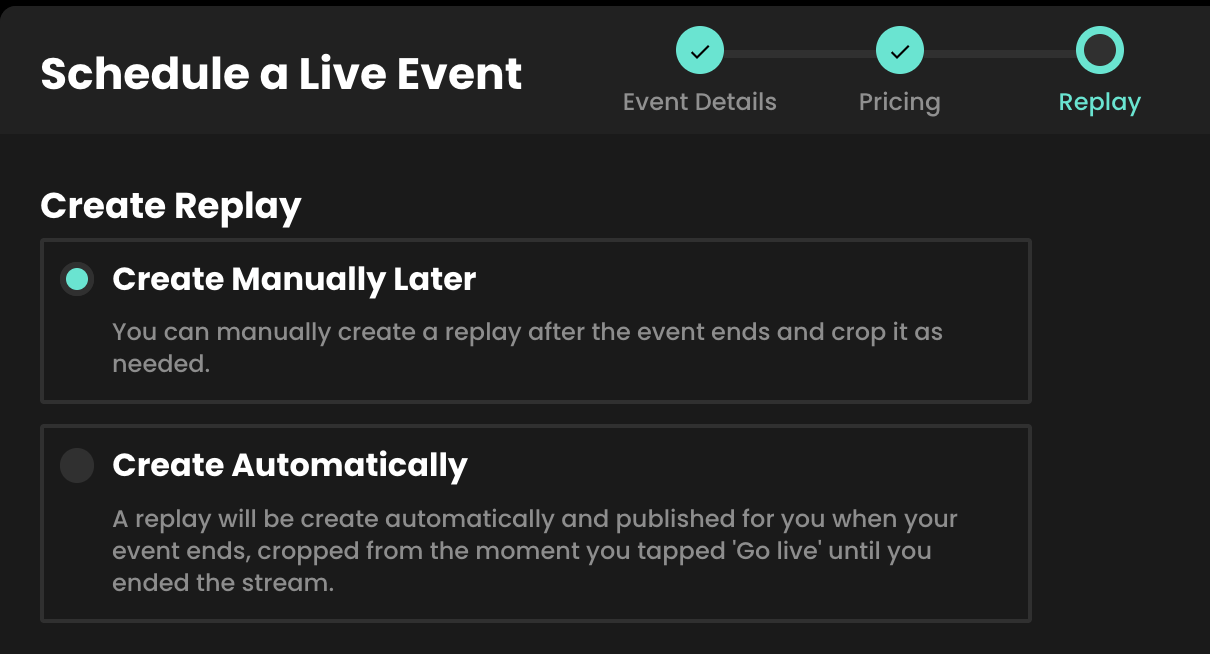
- When scheduling your live event, on the final step, you will be asked to choose if you want to create your replay manually, or create automatically. Select "Create Automatically"
- Adjust the title & description
- "Replay" is already added to the video title. And the description will remain the same. However you can adjust these if necessary.
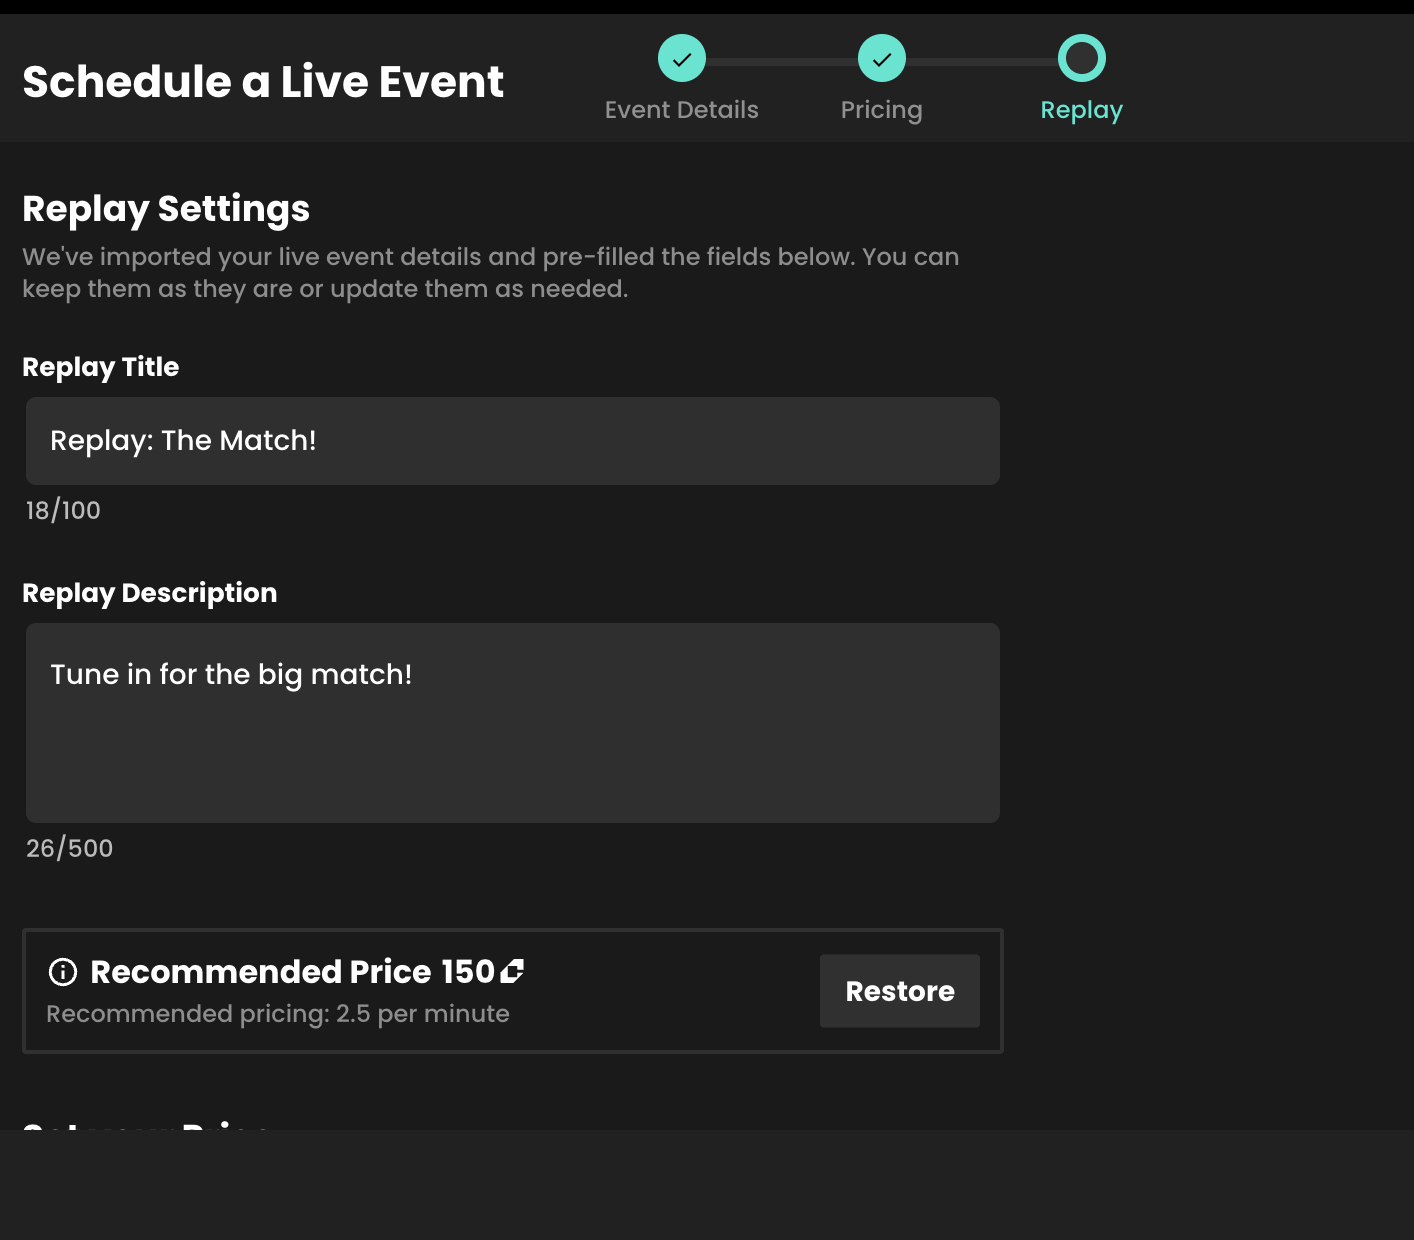
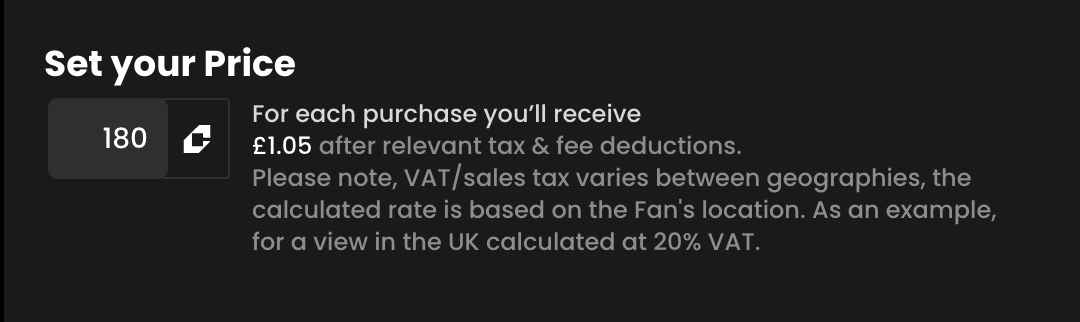
- Adjust your price for the replay if necessary
- Your price will default to the price of the original live, but you can adjust this for the replay if necessary
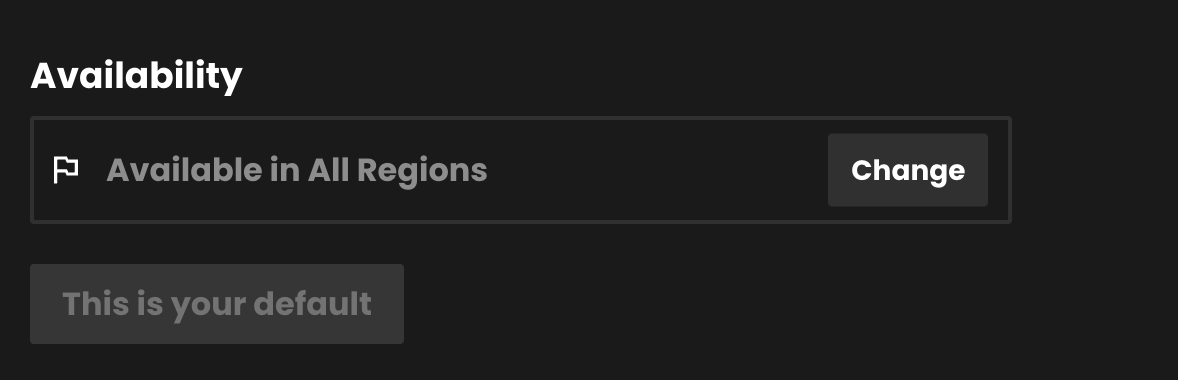
- Adjust your availability
- If the geo-availability differs between the live stream and the replay, you can adjust this if necessary
- Set / Adjust Share Value and Tag and Split Earnings
- if you are using 3rd parties to promote your content and want to change the percentage they will receive for promoting this replay, you can do so here.
- Similarly, you can add/remove any brands you are splitting the earnings of this replay with.
- Click Schedule Event, and your replay will automatically generate upon the conclusion of your stream. And if you've chosen to show all your latest videos on a Widget, it will automatically appear. NB:Transcode times vary depending on the length of your stream.
2. Manually create replays
Once your live event has concluded it’s easy to create a replay of your stream.
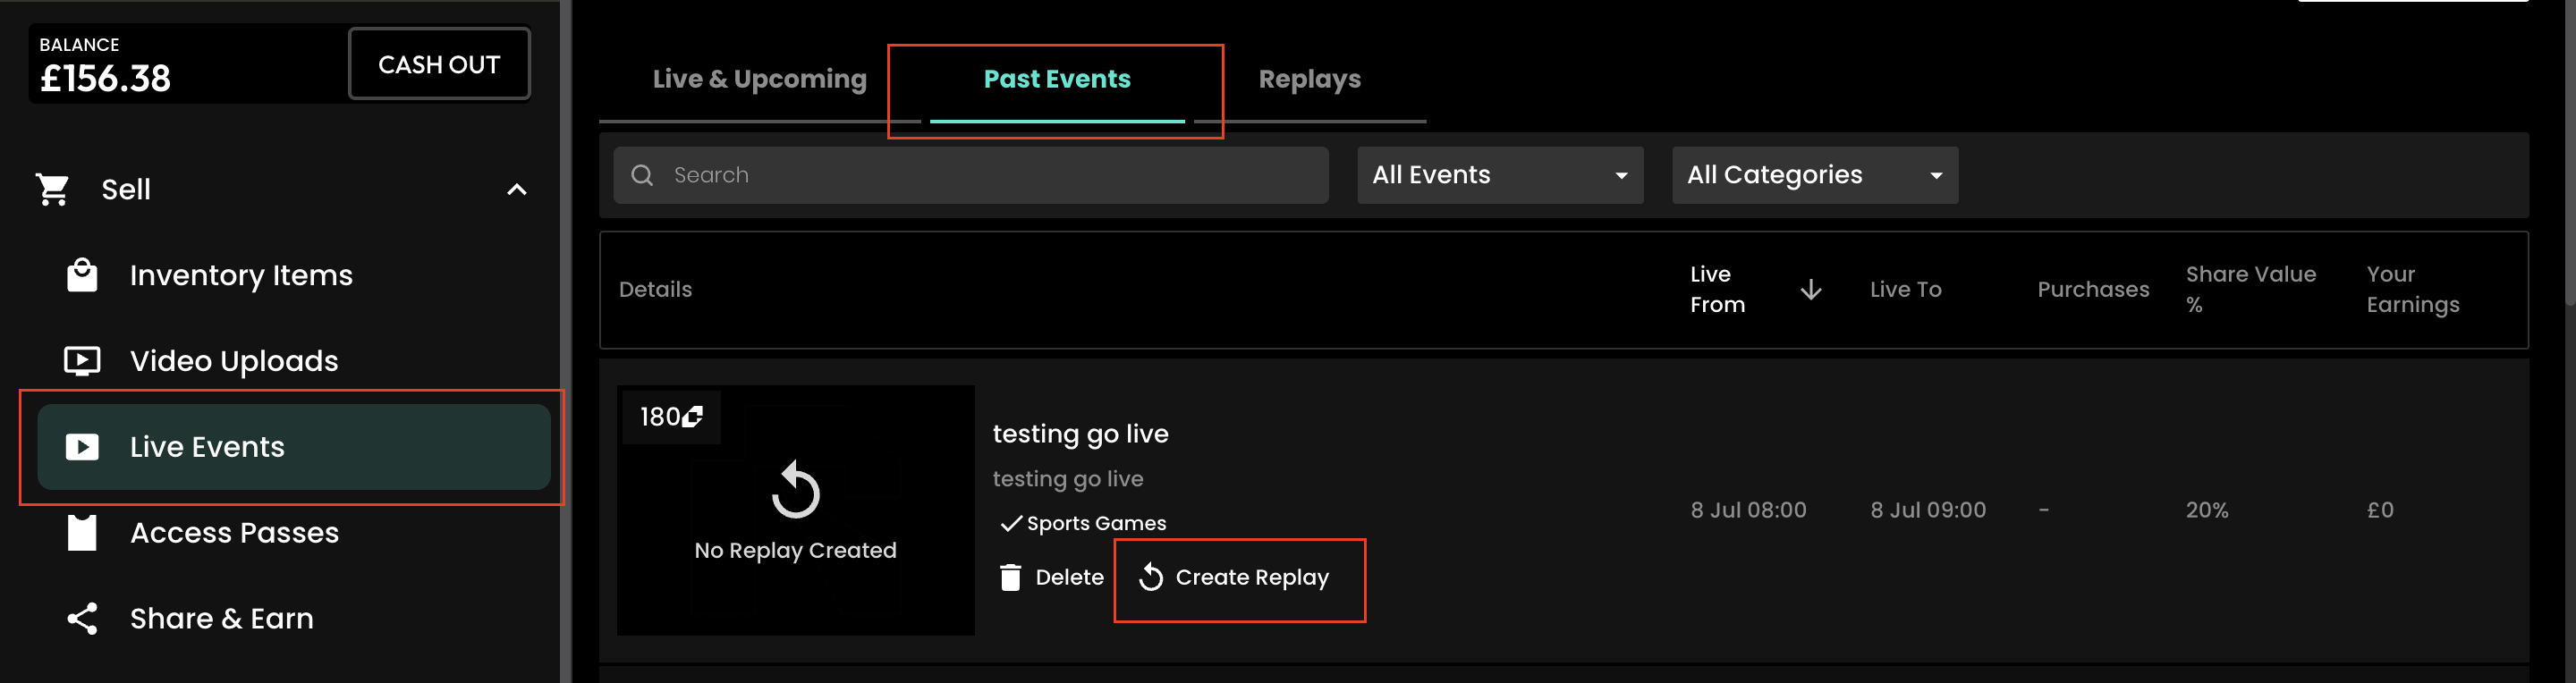
- In Recast for Business find your event under Live Events > Past Events
- Select ‘create replay’.
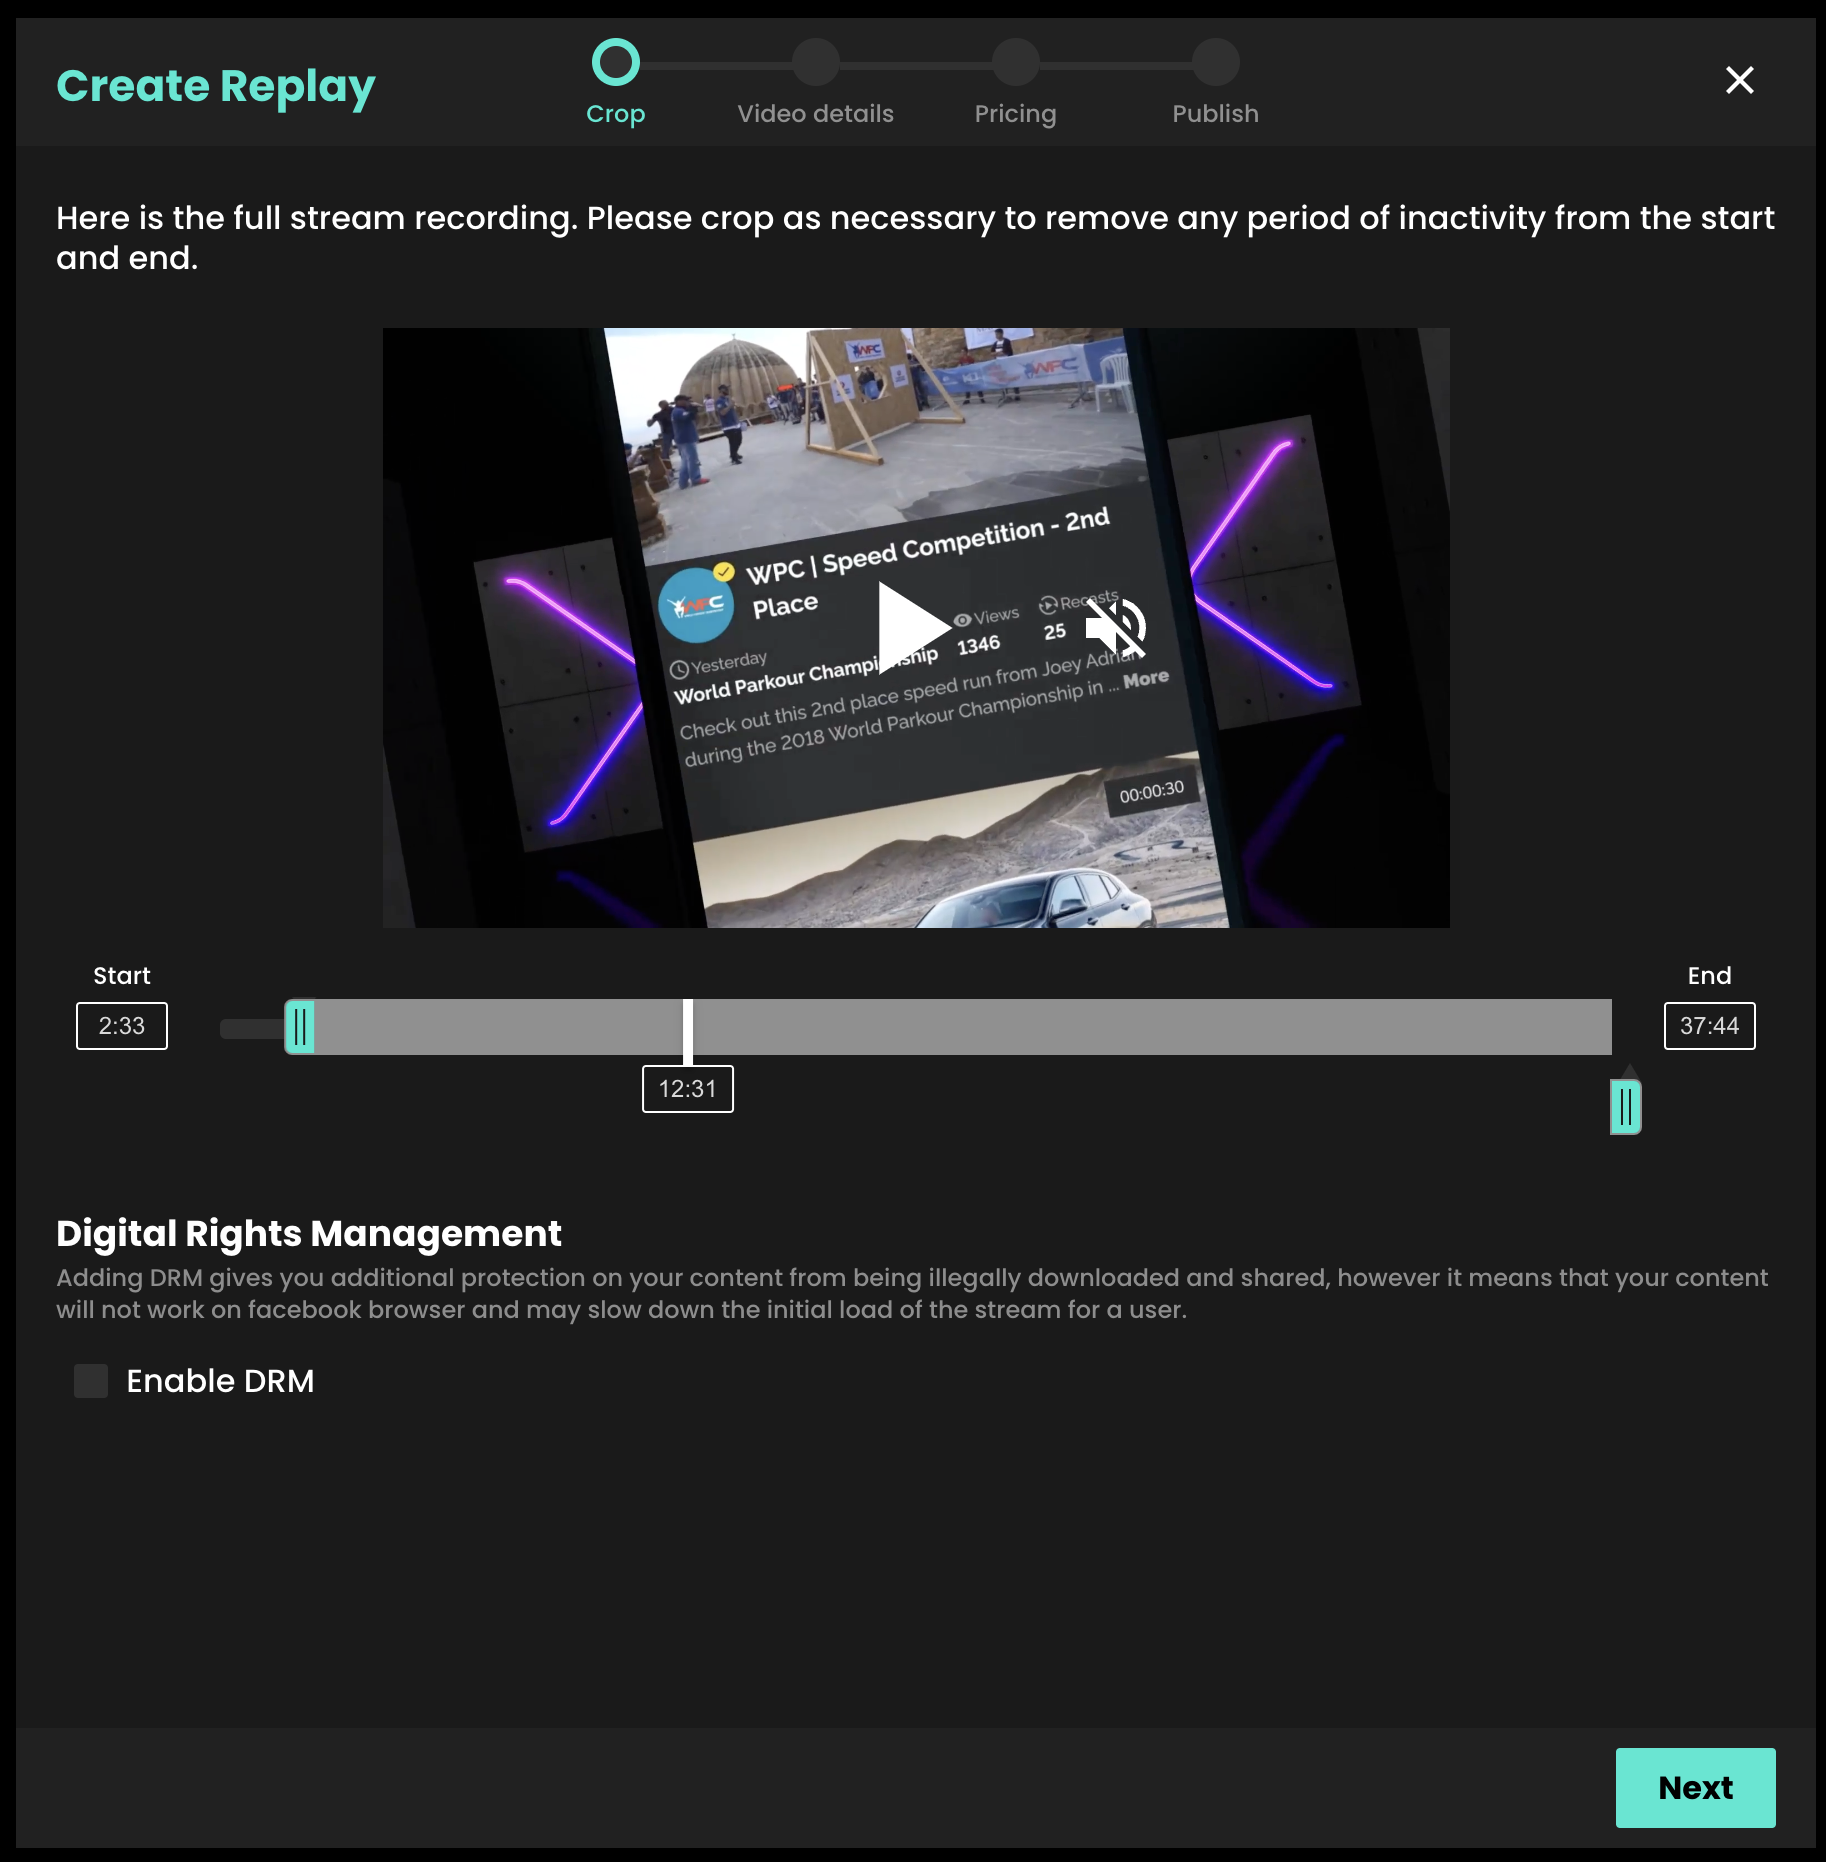
Cropping
On the next page you have the option to crop your replay. Below the video player, drag the two blue markers to your required start and end time. You can also move through the video using the white playhead on the timeline.
Tip: If you need more precisely timed cuts, you can enter specific crop times using the time selection boxes either side of the timeline.
Click next once you are happy with the crop on your replay
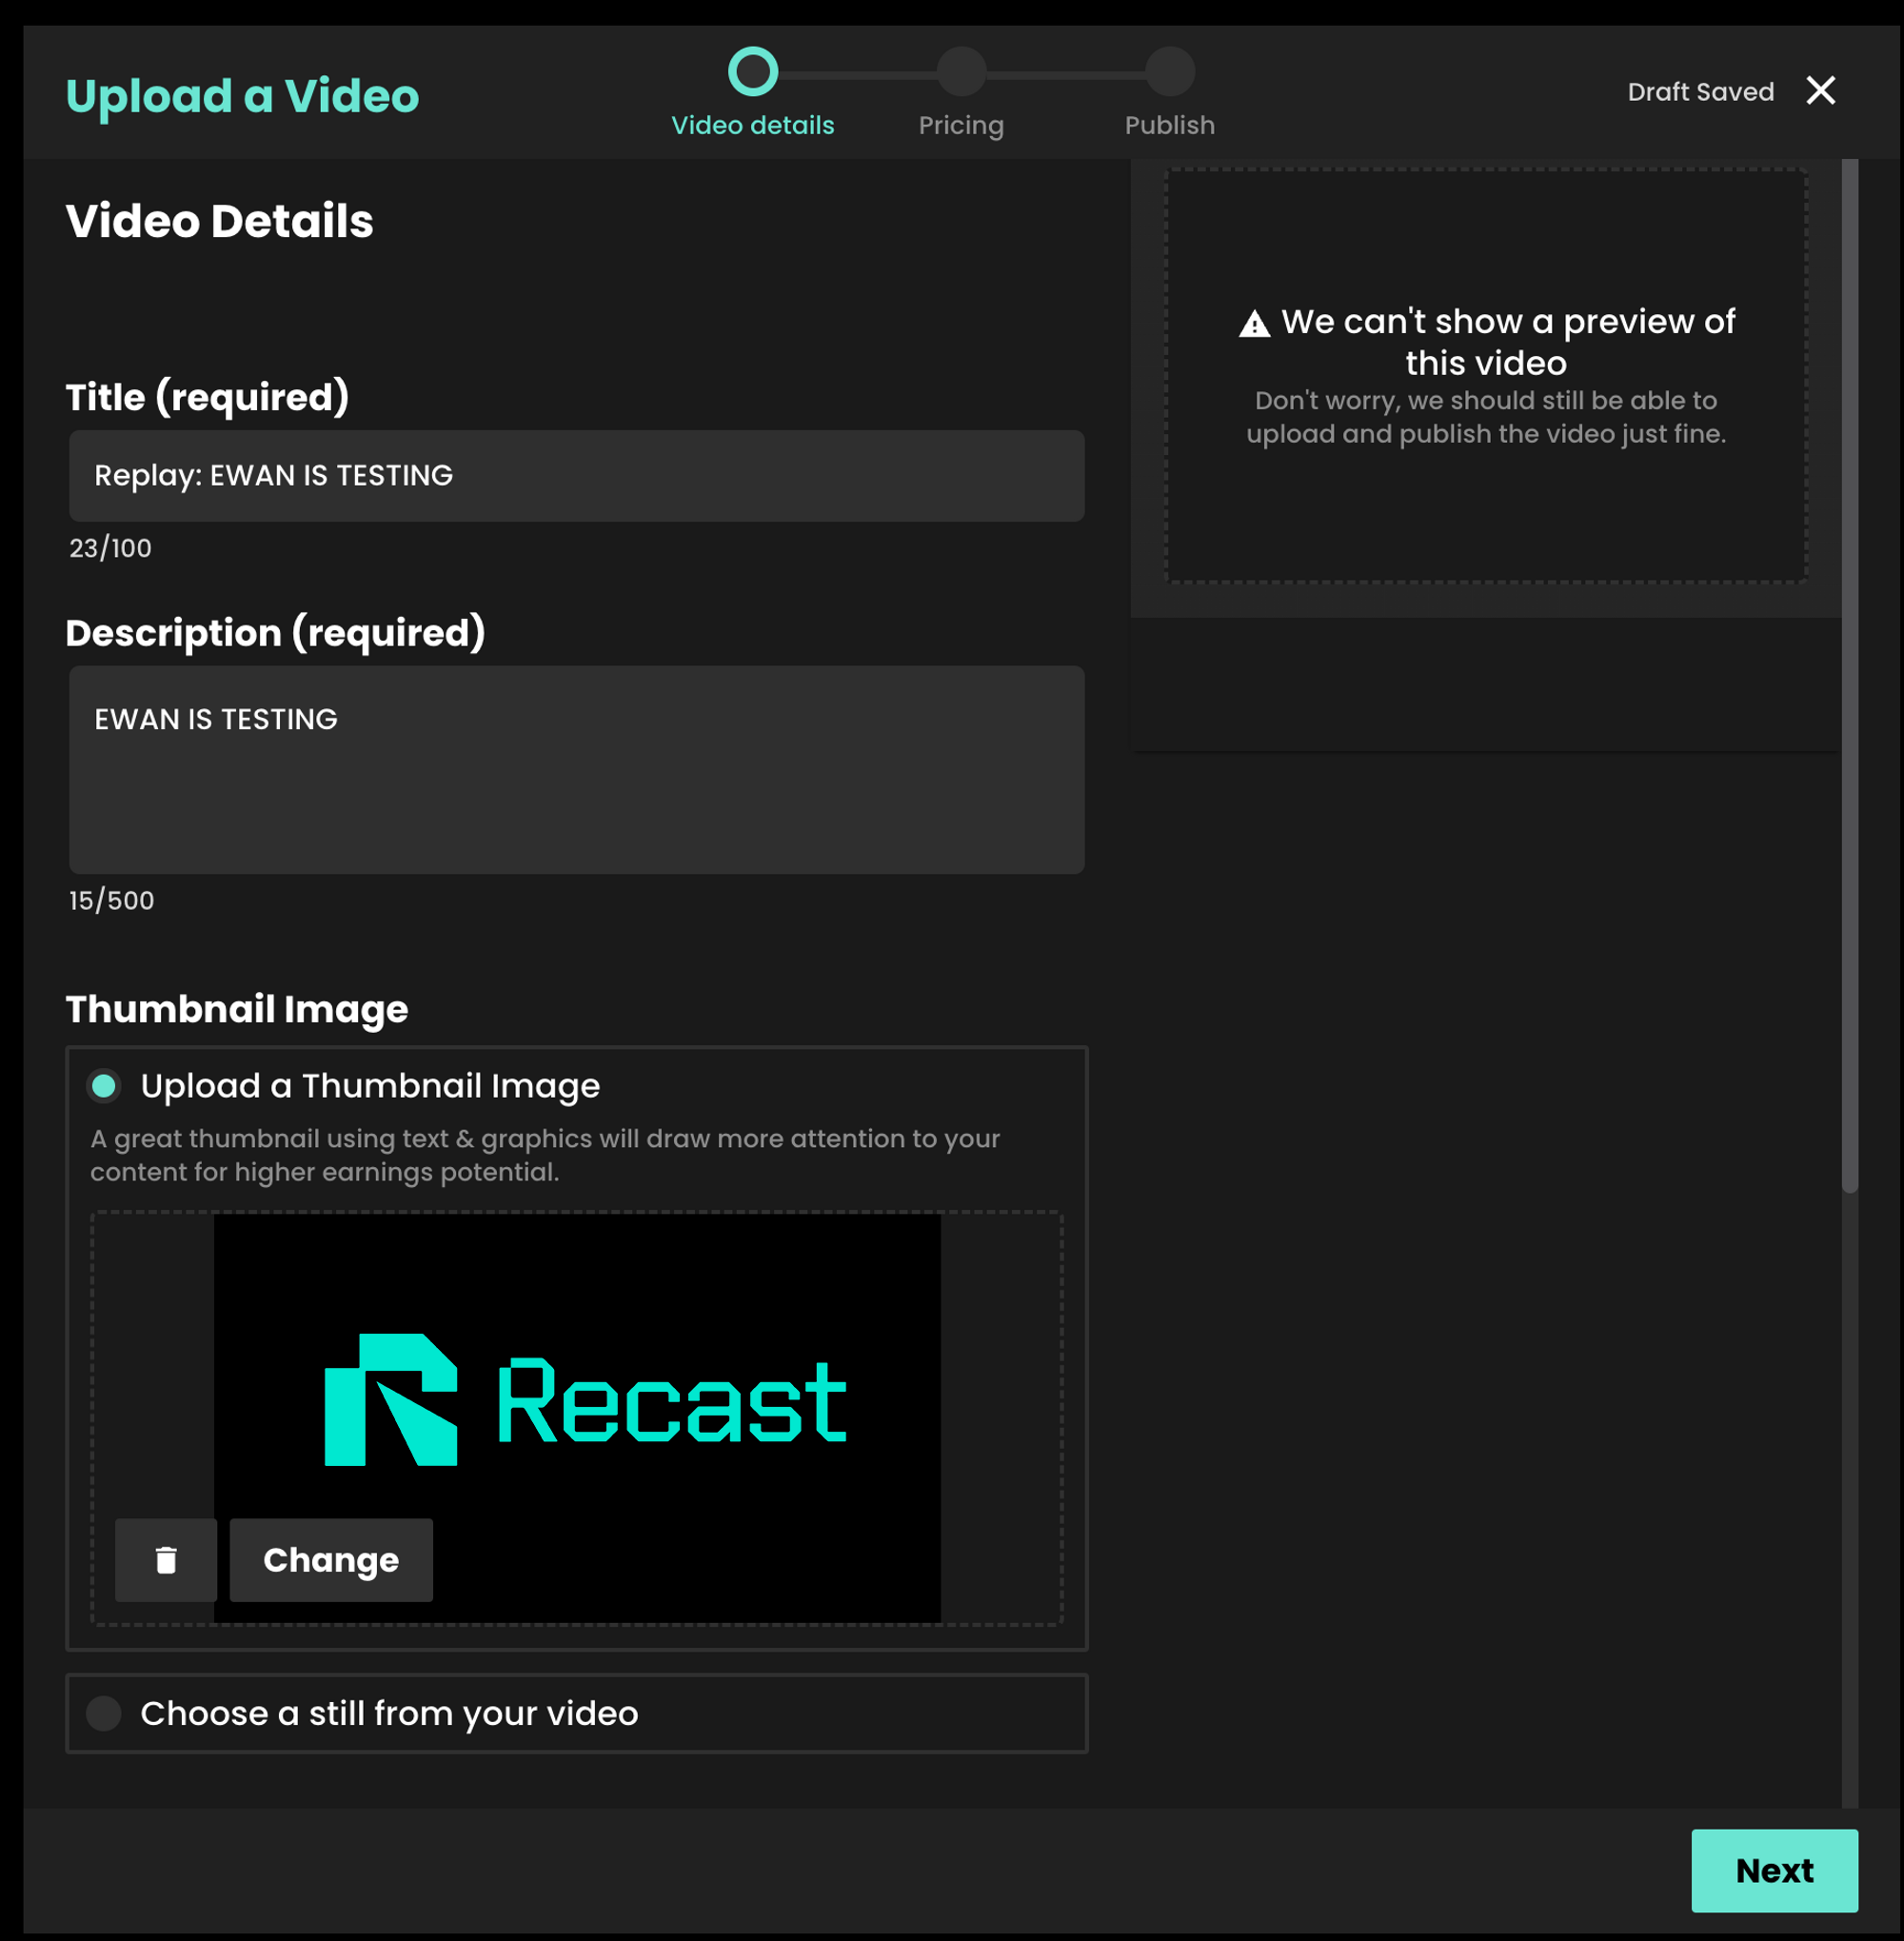
Publishing the Replay
On the next screen you’ll see our regular video upload form. We automatically carry over all the information from your live stream such as the description, price and geo-blocking settings. We also carry over the title and add ‘Replay’ to the start of it. You can edit all of this information before publishing your replay.
Like video uploads, you have the same options to publish the replay as soon as it is ready, publish it manually later or at a scheduled time.
Create a widget for your replay
As a reminder, the widget for your live event will not automatically show your replay. To show the replay on your website, create a new Embed Widget containing this on demand content. Learn more in our "Embed Recast into your website" guide.
